
In Azure DevOps, manually running test cases for every release can quickly become repetitive and time-consuming. You might manage tests using test plans or create individual work items and execute them manually.
With this integration, you can automate those test cases in Leapwork, run them as often as needed, and easily analyze execution reports and results directly in ADO.
Note: The screenshot on this page uses the Elegance Design, introduced in 2025.3. If you are using an earlier version, your layout may look different.
Import ADO test cases in Leapwork
Once ADO connection is created, we can import flows as part of test cases in Leapwork.
-
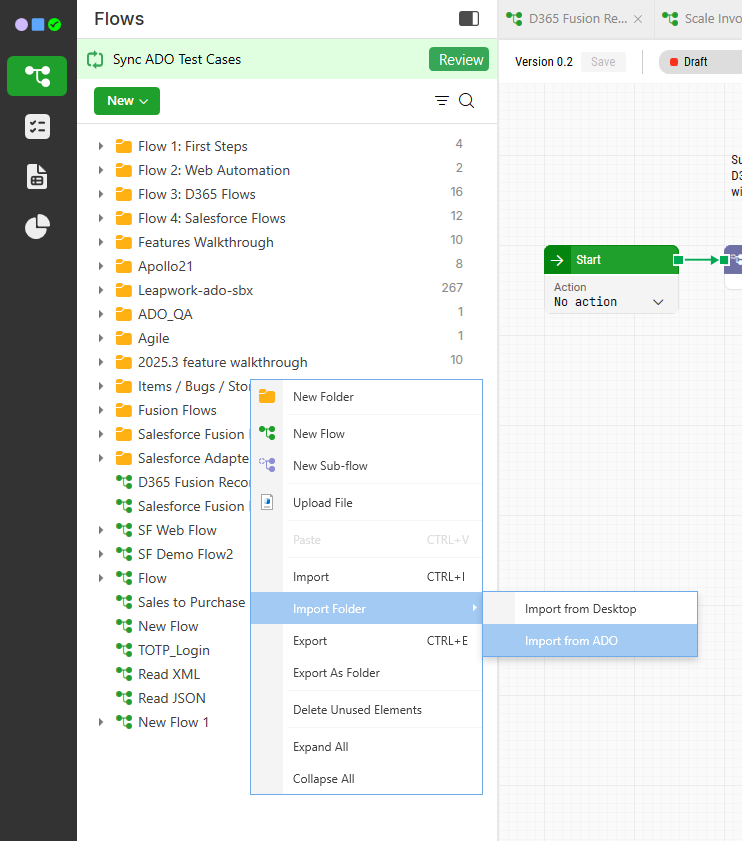
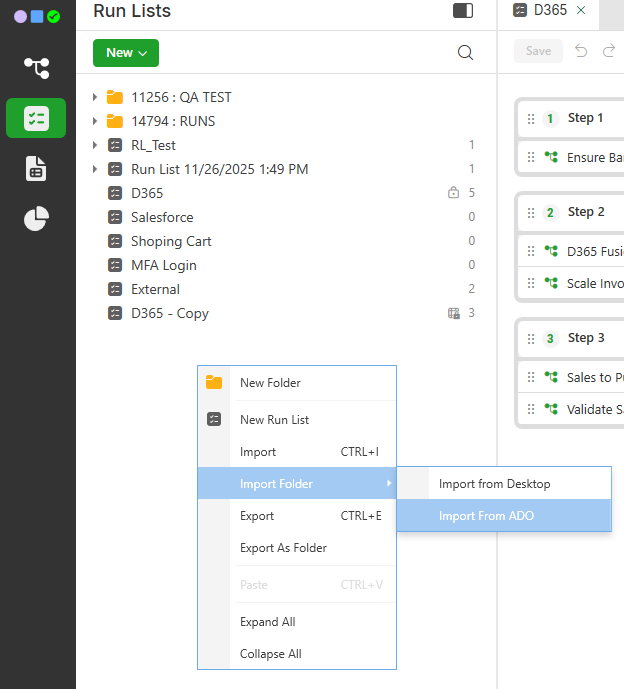
Right click in the left window.
-
Select Import from ADO.
-
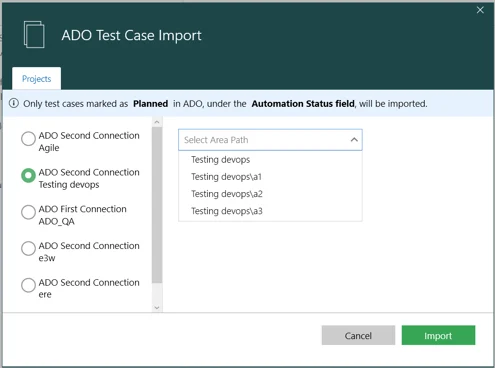
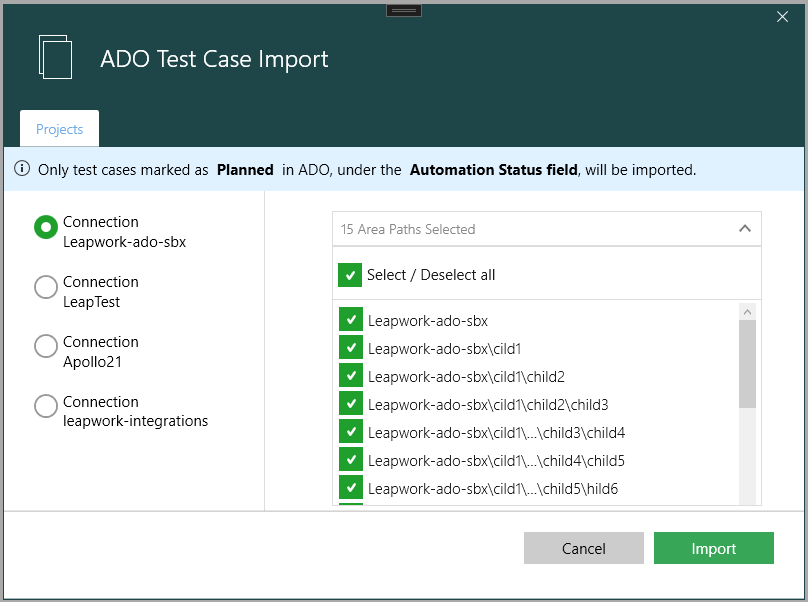
In the import window, select the ADO project you want to import test cases from.
-
Select an Area Path to filter the test cases within the selected project.
-
Click Import.
Note: Only test cases marked as Planned in ADO, under the Automation Status field, will be imported.
The test cases are imported successfully.
-
Click OK.
-
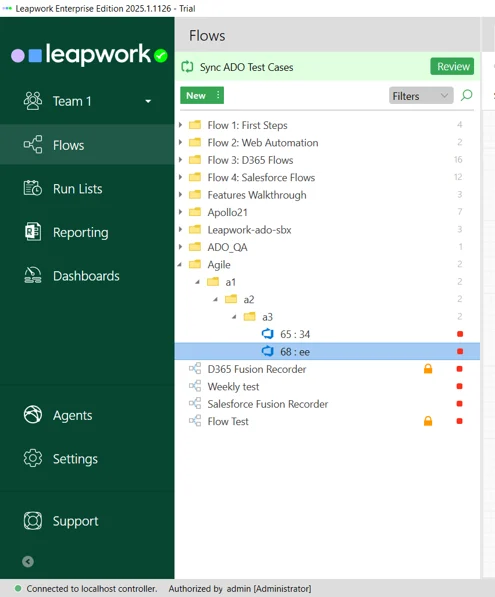
On left, the test cases are created in project folder Leapwork-ado-sbx. Within the project folder, the structure is defined by the area in ADO.
-
Click to expand a project folder. The ADO imported test cases list appears. The test case filename includes testcase id and test case name.
After importing all test cases, you can start recording flows and executing test cases using a run list. The linked test case and its summary are automatically displayed in the Flow settings.
Sync ADO test cases in Leapwork flow
Important: The option to sync ADO test cases is available starting from release 2024.1.486. If you are using an earlier release, this feature will not be available. Please ensure your Leapwork version is up to date to access this functionality.
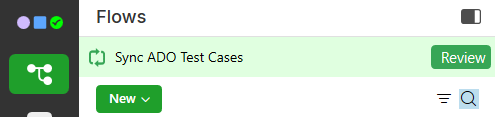
When your project is ready to sync, you’ll see a banner at the top of the flows list.
-
Click Review button.
-
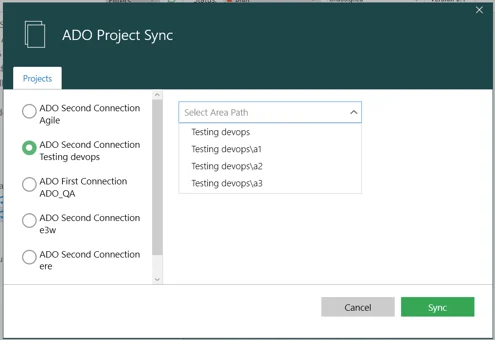
Select a project. All projects associated with the ADO sync appear.
-
Click Sync.
Note: Only test cases marked as Planned or Automated in ADO, under the Automation Status field, will be synced. -
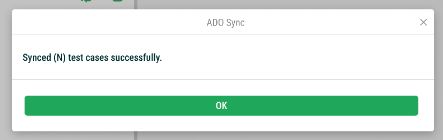
Once the sync finishes, a confirmation pop-up window appears. Click Ok.
Important notes when syncing
To bring in new test cases, use the Re-import option in Leapwork.
Import ADO test plan in Leapwork
-
In Run lists, right click.
-
Select Import from ADO.
-
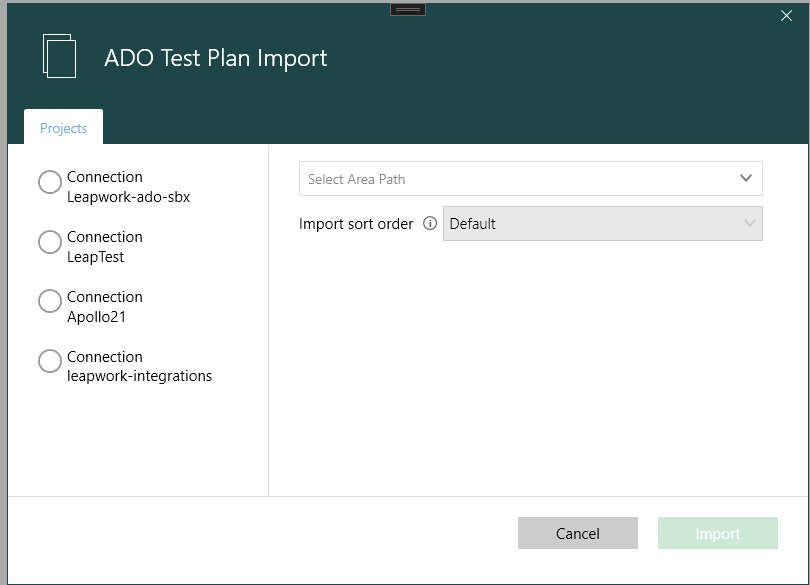
Select a project. All the test plans related to that project appears. Each test plan is created based on the test suite and configuration.
-
Select a test plan and click Import.
Note: Only test points marked as Planned or Automated in ADO, under the Automation Status field, will be imported.
-
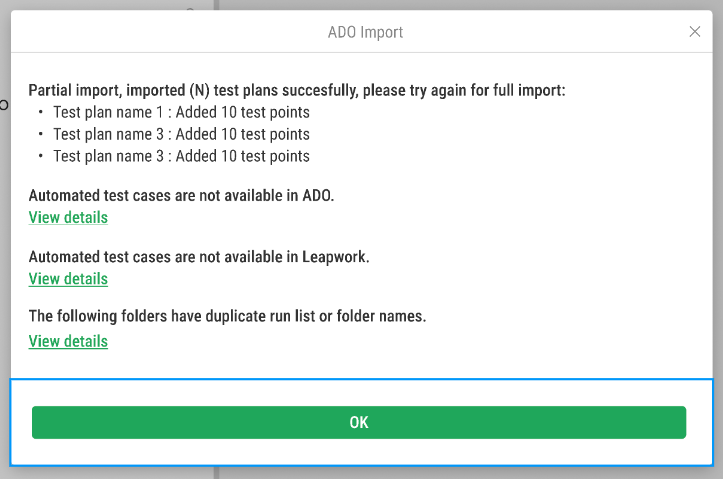
Click View Details. If there is no test case in a test plan, a message appears - Automated test cases are not available in ADO.
The information displayed in the ADO Import pop-up window is dynamic based on the result of the importing process:-
TC Successfully Imported: Imported all suitable test points successfully.
-
Automated TC Not Available: It displays the test cases not imported due to unavailability in ADO or Leapwork.
-
Collision: It displays scenarios where Leapwork already has manually created run lists or folders with the same names in the run list section.
-
-
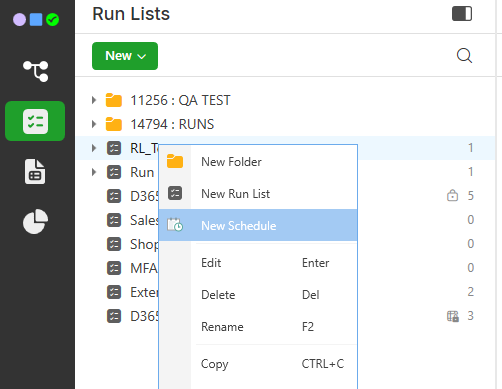
Click OK. On the left, run list and configurations appears. Each run list has test cases that you imported in previous steps. Runlist is created on the basis of configuration (Windows 10/11).
-
Right click on a run list and select New schedule.
-
Enter title of the schedule and click Save. The new schedule is created on the left.

-
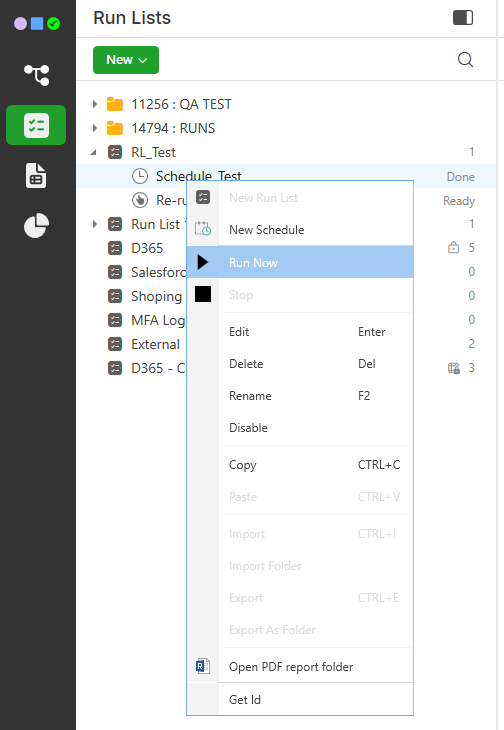
Right click on the new schedule.
-
Select Run Now.
Publish execution results on ADO
In ADO, you can verify that while execution, test run is in progress or completed as shown below.

-
In ADO, click refresh.
-
Click on a test run.
-
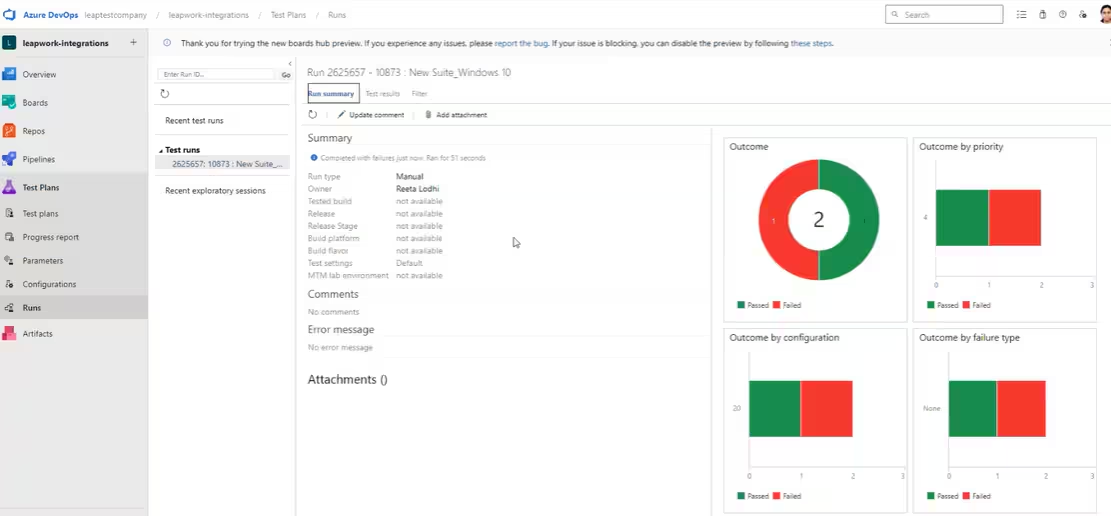
Click Run summary. On right in pie chart, you can see that the result shows that one test case passed and one failed.
-
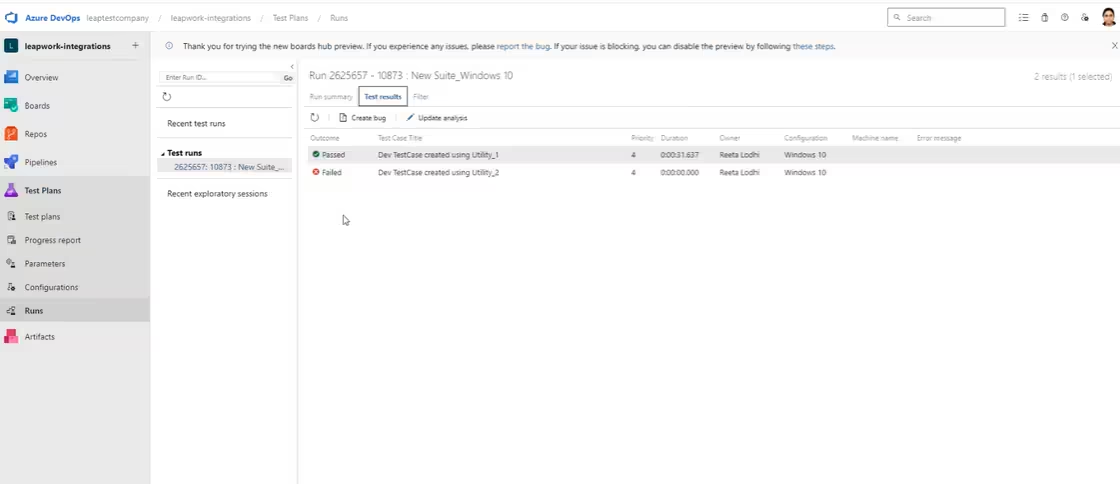
Click Test Results. You can see that the result shows that one test case passed and one failed.
Note: Once a test case is run, the status of that test case will be automatically change from Planned to Automate in ADO, under the Automation Status field.
-
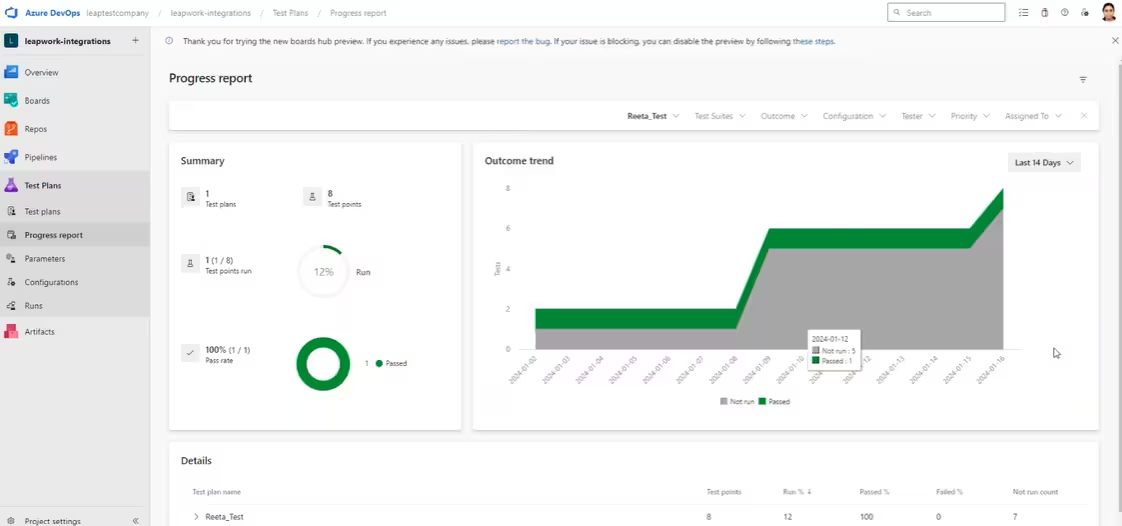
Click Progress Report. You can analyze results based on test suits and available filters.
Create bugs from Leapwork to ADO
You can create bugs directly in Leapwork, these bugs will then be reflected in ADO.
-
In Leapwork, click Reporting.
-
Right click on a specific flow with Failure Status.
-
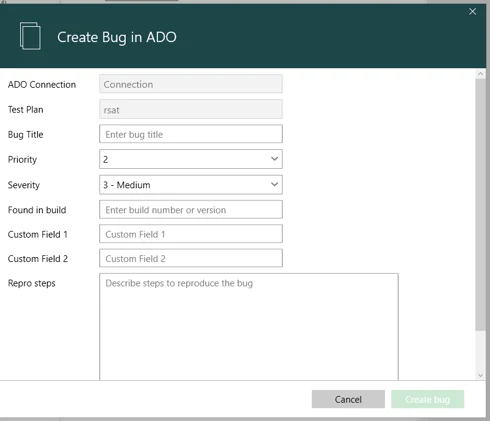
Select Create a bug in ADO.
-
On the Create a bug in ADO pop-up window:
-
Click Create.
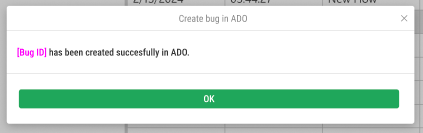
The bug has been created successfully in Leapwork and is now reflected in Azure DevOps.