-
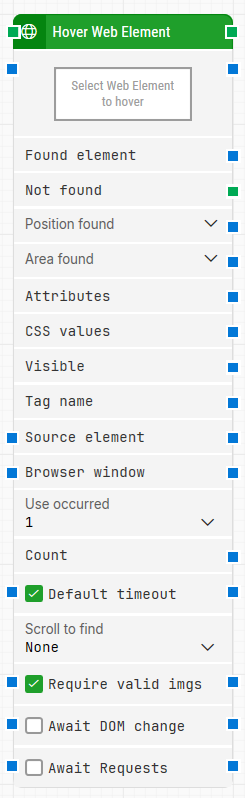
Block header: Shows the current name of the Hover Web Element block. You can rename it by double-clicking the header and typing a new title. The green input connector starts the hover operation when the flow reaches this block, and the green output connector triggers when the element has been hovered successfully.
-
Select Web Element: Contains the locator for the web element to hover.
-
Right-click and choose Capture new web element to capture the element.
-
Right-click and select Edit web element to adjust the locator.
-
Right-click and select Clear web element to remove it.
-
Found element: Holds the found web element in the browser window. You can connect this to Source element in other blocks to narrow later searches to this element or its descendants (for example, specific table cells).
-
Not found: Green output connector that triggers if the web element cannot be located before the timeout expires. Use this connector to branch the flow or explicitly fail the case.
-
Position found: The browser canvas position where the web element was found, expressed as X and Y coordinates. The top-left corner of the browser canvas is position 0, 0. Any non-visible element (for example, hidden via CSS) will have position 0, 0.
-
Area found: The position and size of the found web element as X, Y, Width, and Height coordinates, starting from the upper-leftmost pixel of the element. The origin 0, 0 is the top-left corner of the screen.
-
Attributes: Lists all attributes on the found web element as key–value pairs, including standard HTML attributes (class, style, href, etc.) and custom attributes (data-xxx, and so on). For working more directly with attributes, you can use the Get Web Attribute block.
-
CSS values: Reserved for future use. Currently this property is not populated.
-
Visible: Returns True if the found web element is visible; otherwise returns False.
-
Tag name: The tag name of the found web element, for example div, tr, button, or input.
-
Source element: Limits the web element locator to search only inside a specific parent element.
-
Browser window: Specifies which browser window the block should use. This is typically set by a Start Web Browser block and can be reused by other web blocks to keep actions in the same window.
-
Use occurrence: Determines which matching element to hover when more than one is found.
-
Count: Contains the total number of web elements that matched the locator. Useful for validations or conditional branching based on how many matches exist.
-
Current index: Shows the index of the element currently being hovered when Use occurrence is set to All. For example, in a list of three matching div tags, this will contain 1, 2, and 3 across the three iterations.
-
Completed: Green output connector that triggers once all occurrences have been processed when Use occurrence is set to All.
-
Default timeout: Controls how long the block will search for the element:
-
When the checkbox is not selected, the block uses the explicit Timeout value, which defaults to 10 seconds unless changed.
-
When the checkbox is selected, the block uses the Default timeout value from the flow settings.
-
Timeout: Sets the maximum time the block spends searching for the web element before giving up and triggering Not found. This timeout is specific to the block. Each case also has a separate global timeout in the Settings panel; if that is exceeded, the case is cancelled regardless of this block’s timeout.
-
Scroll to find: Enables scrolling while searching for the element when set to a value other than None. This is useful in scrollable pages where elements may only appear when scrolled into view or loaded lazily (for example, infinite scroll).
-
Max repeats: how many scroll attempts to perform before giving up.
-
Amount: how far to scroll on each attempt.
-
Delay (sec): pause between scroll actions.
-
Require valid imgs: When selected, any web element locator that targets an image (img tag) also verifies that the image loads correctly. For example, by validating that the image source responds successfully.
-
Await DOM change: When selected, delays the search for the web element until there have been no changes to the page’s DOM for a specified period (for example, three seconds). This is helpful when waiting for JavaScript updates to finish. The internal wait is capped so the search still proceeds after a maximum of about 30 seconds.
-
Await Requests: When selected, delays the search for the web element until there have been no active XHR requests for a specified period (for example, three seconds). This is useful on enterprise applications that perform heavy background loading.
-
Await Timeout: Defines how many seconds the “await” conditions must stay stable (no DOM changes or no active XHR requests, depending on which options are enabled) before the block proceeds.